Learn The Difference Between PDF and Word!

What is the critical difference between Word and PDF files? Which is more useful or beneficial to the user? Please continue with the article as it will explain the difference between Word and PDF below!
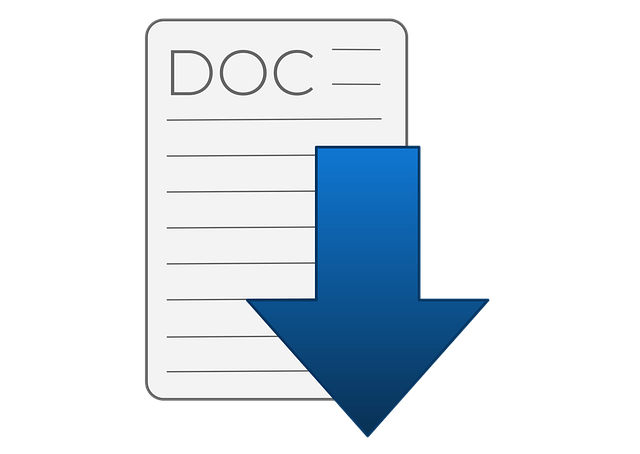
Word Document

DOC files are created in 1983, as the developer is Microsoft. It was a word processing document created which is also a filename extension for the document. Users can use it as documentation in the form of text, tables, graphics, images, pages, etc.

DOC

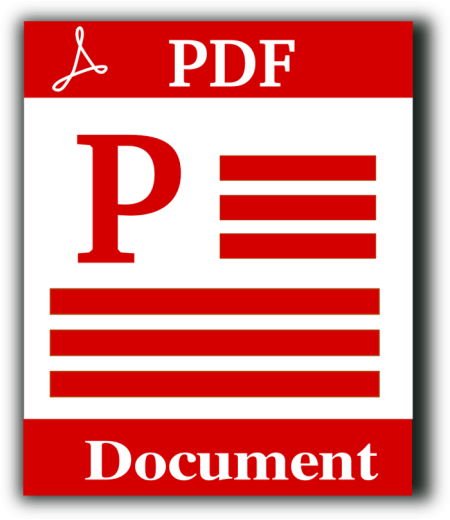
PDF – Portable Document Format

While for the PDF format, it is created in 1993 approximately ten years after DOC file. It is more like an open file document for view and document exchange between users. The main reason for PDF format is to make document sharing between computers or operating system more comfortable and faster. PDF files aren’t able to modify and edit without PDF editor software.

Acrobat PDF

Difference Between Word and PDF

Word file is very compatible with most of the operating system available on the Internet. Users can open Word file on all type of policy and able to edit the content of the file easily. This format allows users to produce a text document fast and mobilise by utilising the writing toolset provided in Mircosoft Office. Text and material are editable upon other users and varieties type of document presentation through DOC format.

While for PDF document is more about sharing, printing, storing, integration, content security, etc. When it comes to finalising a document or sending to other users, most users will choose PDF format instead of Word because PDF file is uneditable and modifiable. It will keep all the content, images, graphs in the same layout a format even it is opened by different operating system or reader.

PDF also allows users to encrypt PDF password or lock PDF to ensure the content of the file is safe and protected. Unlike Word file, the content is public and editable by all who own the data. This make PDF produces a higher quality document format for users to print and share with a different supporting system.

But on the other hand, Word document will be better if the receiver user needs to reuse some of the images or graph and edit the content before finalising the document. Therefore, both file format has its purpose and uses. It mostly depends on one’s need when coming to preparing a document file.

Document File

PDF and Word are Compatible

After this, most people may think that is it the document file in the computer system is divided into two: The Microsoft and Acrobat. Like Apple and Android in the mobile phone industry. PDF and Word are not precisely like Apple and Android because both these file formats can be converted to one another.

In Microsoft Word, the user can save their Word file in PDF format by going to Menu > Save as > PDF Format. While for Acrobat user, the user can export the PDF file to DOC/ Word format by choosing Export PDF > Word Document. Even though sometimes a user may want to edit a PDF file, the user can use a PDF converter software to convert PDF to Word easily. Vice versa, the user can convert Word to PDF by using the same PDF converter software.

At the End of The Day…

Please refer here for more about PDF to Word Converter.

The Volume Does not Contain a Recognized File System Windows 10

If you received “The volume does not contain a recognized file system” in USB/external hard drive/partition on your computer, don’t worry. This article offers solutions to fix the issue. You can recover data from the RAW hard drive or inaccessible USB/external hard drive/SD card with Bitwar Data Recovery Software.

What is “The Volume Does Not Contain a Recognized File System”

During the use of the computer, many users may encounter the issue of “The Volume Does Not Contain a Recognized File System“. And it occurs not only on the computer’s hard drive, but also on external devices such as external hard drives, USB flash drives, and SD cards.

Now, we’d like to tell you the good news – this problem can be fixed and all data saved on the inaccessible drive can be recovered.

First, to avoid damaging important files lost by the storage device, we will show you how to recover data from a damaged disk or external devic

What is the RAW file system?

The file system on PC is used to manage how data is stored and retrieved. Without a file system, information stored on the storage device would be a mix of large amounts of data which will lead to inaccessible files. Information can be easily isolated and identified by dividing the data into sections and naming each one of them.

The structure and logic rules that used to manage the groups of information and their names is a file system. There are many different kinds of file systems, including FAT (FAT12, FAT16, FAT32), exFAT, NTFS, HFS, HFS+, ext2, ext3, VMFS, UDF, etc.

RAW is the default file system of CD-ROM recognized by the operating system. When burning DVD, you can see a RAW mode that extracts user data and subchannel data.

However, other storages such as hard drives and USB drives are formatted as FAT or NTFS. If storage devices become RAW, then it can’t be accessed, as RAW is regarded as an error of file system. If you try to open RAW partition, you will get an error messages such as “You need to format the disk in drive G: before you can use it.” 

Why does “The Volume Does Not Contain a Recognized File System” problem occur?

The following reasons could lead to file system unrecognized problem:

● reinstallation of system.

● getting attacked by virus.

● users’ misapplication.

● abnormal shutdown of computer.

● file system conversion failure.

● accidental deletion of necessary system files.

● physical failures like bad sector.

● unstable or insufficient power supply.

The importance of recovering data in advance?

Before resolving “The volume does not contain a recognized file system” error, all you need to do is find a RAW drive recovery software to get back the files. Offering powerful and easy RAW recovery solutions, Bitwar Data Recovery allows you to recover lost data from the RAW drive directly, such as digital camera, hard drives, SD cards, Memory cards, phones, media players and portable drives. It can also recover audios, videos, pictures, archives, emails, and documents from these devices.

How to recover data from the raw partition?

Download and install Bitwar Data Recovery on your Windows, and then follow the guides to recover data from the volume does not contain a recognized file system (raw partition).

Step 1. Select the raw partition or device

Launch Bitwar Data Recovery software on your Windows. Select the raw partition or devices where you want to restore important data and click “Next”.

Step 2: Select the Scan Mode

You can choose Quick Scan mode to recover lost files. If files are not overwritten by other data, files can be fully recovered.

If you cannot find files through Quick Scan, try DeepScan. Deep Scan will search every sector of the hard drive to find all existing files. But the scanning process spends more time and will not have the original file name in the scanning results.

If you perform the partition in a quick format, select Formatted Recovery on this step.

Let’s try now!

Please refer here for more about data recovery.

Free Fix Can’t Read Source File or Disk

Recently, we’ve received many complains from various customers who were copying some files on the Seagate hard drive and finally the action was blocked due to a Windows prompt: Can’t read from the source file or disk. Here in this article, we’ll introduce you the best way to solve this issue.

Seagate hard drive is the one of the mostly useful hard drive during the daily life, everyone believes in the quality, the extraordinary data access speed and there’s no doubt that Seagate hard drive is the requisite brand while users are buying the assemble computer.

can't read from the source file or disk


However, many of our customers recently complained while copying, deleting or moving files from Seagate hard drive to external hard drive, or from one location to another, it suddenly prompts a message: can’t read from the source file or disk, please don’t panic, we will show you the best ways to fix this issue.

BTW, whether you have Seagate hard drive, Western Digital hard drive or SanDisk SD card or other brand flash storage devices, keep on reading this how-to article to solve the problem.

Way 1. Consider to recover data firstly from Seagate Hard drive.

Due to the inaccessible Seagate hard drive, we cannot enter into the partition or external HDD again to rescue the existing files, video, audio, documents, etc. We therefore need to use the free data recovery software to get these files back.

Bitwar Data Recovery is such hard drive data recovery software can restore data from Seagate, Western Digital, Samsung, Toshiba, etc. and it’s not only used for hard drive,  it can also recover data from SD card after formatted or recover data after accidental deletion. Mostly important, there’s no need program skill to operate the software, even a newbie can follow the steps to perform hard drive recovery easily and quickly within few clicks.

Steps to Recover Data from inaccessible Seagate hard drive

Step 1. Download Bitwar Data Recovery Software and then install on the different partition or external hard drive. Note:  Don’t install the software directly to the partition or drive where contains the files you need to recover.

Step 2. Launch the hard drive data recovery software and then select the target device from the software’s interface, click Next to continue.

Step 3. Choose the recovery mode and then click Next.

Step 4. Select the necessary types of files and then click Scan.

Step 5. Double Click the target file to preview and then decide on your own whether to hit Recover button or not.

Let’s try now!

Please refer here for more about data recovery.

Partition Failed Couldn’t Unmount Disk

Have you ever met “couldn’t unmount disk” or “erase process has failed” error on your Mac? How to fix it without data loss?

Recently, I have encountered some problems on my Mac, and it didn’t allow me to repair the directory or permissions in Disk Utility. And an error “Disc couldn’t unmount disk” or “erase process has failed.” Why? This error can happen during partitioning, disk verification and repair, and even during formatting. What’s worse, there’s no additional information provided to solve the issue.

It still can fail to fix disk issues accompanied with some error messages, such as “couldn’t Unmount Disk” or “erase process has failed.” This error generally results from improper modification of the boot drive, such as partitioning, disk verification, or repairing or formatting. When this error pops up, not only will the Disk Utility halt suddenly, but the disk will suffer as well, such as damaged data on this disk. Therefore, it is imperative to resolve this error as soon as possible. Here we will share three solutions.

Methods to fix “couldn’t unmount disk” error

1. Resolve with USB Boot Drive

If “Couldn’t Unmount Disk” or “erase process has failed” error occurs, the simplest solution is to boot the Mac system and run Disk Utility on the disk. By this means, you can make use of USB boot drive.

1. First off, insert the USB boot drive to Mac and reboot.

2. Then, during booting, you should hold down the “Option” key button to select the attached boot drive.

3. Next, in the boot menu, select “Disk Utility.”

4. After that, go to “First Aid” and verify the disk.

5. Lastly, perform the original task on the original disk.

2. Fix with Recovery Partition

If the error message appears during “First Aid” or formatting a non-boot disk, the above means will not make effects surely. At this point, you can try solving it with Recovery Partition.

1. For a start, reboot your Mac.

2. Then, when booting, hold down the “Option” key to select Recovery Partition.

3. Next, access Disk Utility from the boot menu.

4. Lastly, select “First Aid” to re-verify the disk or choose “Erase” to format the disk at your will.

If you found your drive in unmounted condition on Mac and urgently need to recover the data, then recover them as below steps.

Steps to recover data from an unmounted drive on Mac

Download and Install Data Recovery for Mac software

I recommend you to use Bitwar Data Recovery for Mac to recover your lost data from your drive. It is a powerful and all-around data recovery software for Mac, which can recover multiple types of files from different devices, including the Mac platform and even external devices.

Download and install Bitwar Data Recovery for Mac. It is compatible with OS X 10.11 and later.

Step 1: Select the unmount drive

Launch the Bitwar Data Recovery program and select the unmount drive on your Mac, then click “Next.”

Step 2: Select the Scan Mode

Select “Quick Scan” and click “next.” If a quick scan could not scan lost files, try Deep Scan

20200116-101601.png

Step 3: Select the file type

Select the types of files you want to restore on this step. If you have no idea about what types to recover, choose “Select all types,” because you can recover all types in Bitwar data recovery for mac.

QQ20190121-091837.png

Step 4: Preview, recover and save files

20200316-102141.png

Please refer here for more about Mac data recovery.

Bitwar Phoenix Data Recovery key

Free Download full version of Stellar Phoenix Data Recovery Software crack with latest activation key, keygen, serial number, registration code, license code, etc. for 8.0 isn’t safe for your data, here’s a free alternative data recovery software for you.

How to Free Download Stellar Phoenix Data Recovery Software to crack?

Although we are very cautious while operating the PC, data loss is still an inevitable problem. This makes us feel very sad and anxious. Loss of data is a variety of possibilities. You might delete or format files, images, video, audio and other file types from a hard drive, USB flash drive, SD card, or another external storage device, etc.

How to recover data from the situations mentioned above? You might have tried to download Stellar Phoenix Data Recovery Software from the official website and found the software is not free of charges.

Then you might go to the pirate websites to find the full version of Stellar Phoenix Data Recovery Software crack with latest activation key, keygen, serial number, registration code, license code, etc. for 8.0. However, it’s better not to use Stellar Phoenix Data Recovery Software crack due to the installation program always packaged with virus, Trojan, backdoor, spyware or malware which must destroy your computer.

Here I strongly recommend you to use a free data recovery software, which is a full version and has no recovery amount limit.

Bitwar-Data-Recovery_2020-04-03-12-33-23.png

The Free Best Alternative to Stellar Phoenix Data Recovery Crack

Stop using Stellar Phoenix Data Recovery Software Crack right now; you can rely on Bitwar Data Recovery, it’s a free data recovery software with the full version that is same as the Stellar Phoenix Data Recovery, the difference is the software which developed by Bitwar is copyrighted data recovery software and free of charges.

No one would like taking the risk on dangerous software, and you can quickly get free Bitwar data recovery to recover deleted files or formatted files you need.

How to recover deleted or lost files with Bitwar Data Recovery

Step 1. Download Bitwar Data Recovery and install it on your computer, and then launch the software. You can install the software on a Windows or Mac system.

Step 2. Select your partition or device where you have lost files and then click “Next.”

Step 3. Choose “Quick Scan” and then hit “Next.”

Step 4. Choose the exact types of files you have lost, you can select all kinds of types if you have no ideas which to choose.

P3.png

Please refer here for more about data recovery.

Windows Cannot Access External Hard Drive

Summary:

This post offers solutions for solving the “Windows cannot access disk” issue and introduces the Bitwar Data Recovery to restore the losing data. If you are experiencing such a problem, you can find solutions here.
 
When trying to start a program or open a file on your Windows computer, you may receive the error of “Windows cannot access the specified device, path, or file. You may not have the appropriate permission to access the item.”  In the worst case, it could lead to data loss. However, what are the possible causes of this problem, why don’t you currently have permission to access the folder, and what should you do to make sure that you do not lose programs and files?

Fix “Windows cannot access the disk” issue

Solution 1: Check disk connection

      1. Make sure all cables are properly connected between storage devices and computers.
      2. As to external hard drives, you can try to unplug disk or different cable on a different USB port. Then restart the computer.
      3. Make sure the USB port does not have a power supply issue, as insufficient power supply tends to cause inaccessible drive.

Solution 2: Change the drive letter assigned to the affected hard drive

The most effective method that users in similar circumstances have used to successfully get rid of the “the disk check could not be performed because Windows cannot access the disk.” error is changing the drive letter assigned to the affected hard drive.
 
     1. Press the Windows logo key + R to open a Run dialog.
     2. Type diskmgmt.msc into the Run dialog and press Enter to launch the Disk Management utility.
     3. in the list of drives connected to your computer, locate and right-click on the affected external hard drive, and click on Change Drive Letter and Paths….
     4. In the window that pops up, click on the current drive letter assigned to the drive to select it and click on Change.
     5. Open the dropdown menu located directly in front of Assign the following drive letter: and click on whatever new drive letter you want to be assigned to the drive to select it.
     6. Click on OK.
     7. Click on OK in the Change Drive Letter and Paths for X: () window.
     8. Close the Disk Management utility and restart your computer.
     9. When the computer boots up, try running CHKDSK on the affected external hard drive and check to see if the problem persists.

How to recover lost data?

You should recover lost data with a third-party data recovery software — Bitwar Data Recovery software is designed to recover deleted, formatted or inaccessible files from Windows PC, laptop, hard drive, SSD, memory card, USB drive, SD card, digital camera, multimedia player and other storage devices.
 
Free download Bitwar Data Recovery software here and install it on your computer, then follow the steps to recover lost data.

Please refer here for more about data recovery.

Split PDF File

We all know that all PDF files are read mode only and are unable to edit the content. Deli PDF Converter has provided a lot of useful tools for users to explore! One of the tools is to allow users to split and rotate their PDF files. You can decide to split the pages or rotate the view of the content in the software.

Just follow the instruction below, and you can split and rotate your PDF file easily!

Steps to Split or Rotate PDF File

Remember to download Deli PDF Converter from the official homepage and install it on your computer before continuing with the tutorial.

QQ%E6%88%AA%E5%9B%BE20191014145436.png

Step 1. Launch the software. At the main interface, choose “Other PDF Tools” and “Split/Rotate PDF.”

Split-or-Rotate-PDF.png

Step 2. Choose the file that you want to edit into the software and zoom the PDF page on the top column of the window to have a better view of the data.

Zoom-Page.png

Step 3. Put your mouse on the PDF page, and you can choose the rotation direction on the page.

Rotate-File.png

Step 4. Choose the page you want to split and drag your mouse to the side of the page and click the “Scissors” icon.

Split-Page.png

Step 5. You also can batch rotate your PDF files by clicking the rotate all “Left” or “Right” at the bottom of the software.

Batch-Rotate.png

Step 6. After finish, all the settings, click “Convert” to start the conversion.

Split-or-Rotate-Convert-1.png

Please refer here for more about PDF Converter.

The Request Failed Due to A Fatal Device Hardware Error Seagate

Summary:

The request failed due to a fatal device hardware error or not accessible fatal device hardware error is a commonly seen error that causes data loss from Western Digital or Seagate hard drive. Today in this article we will focus on how to fix this issue.

Yesterday, a customer sent us an email and asked why his computer appearing the request failed due to a fatal device hardware error and he couldn’t access the Seagate hard drive. Then, he asked us for help and finally fixed the issue and get back his deleted files.

That’s why today we would like to tell about this issue and show you the steps to fix the request failed due to a fatal device hardware error and recover deleted files.

What is the Request Failed Due to A fatal Device Hardware Error?

To explain what is the request failed due to a fatal device hardware error happens on WD or Seagate hard drive to whom does not meet such issue before, we took a screenshot as below:

Generally, you’ll get an error message showing that X: \path name is not accessible. The request failed due to a fatal device hardware error. Yet, you may receive such location is not available error message no matter from the hard drive, SD card or on Disk management on Windows 7/8/10.

3 Ways to Fix The Request Failed Due to A fatal Device Hardware Error


At this moment, the system just informs you the device is going to the end of its life. You should hurry to download the hard drive data recovery software in order to rescue the data from the hard drive.

Consider the vital data on the hard drive, the earlier you perform the hard drive recovery, the faster you can retrieve data.

The best solution to recover data from inaccessible partition/folder/drive?

From the previous data recovery tutorials we posted on the tutorial section, you probably agree that losing data no matter from accidental deletion, formatting or even worse scenarios, such as the request failed due to fatal device hardware error, you need to format the disk before you can use it; USB shows 0 byte or any other issues from any of the storage devices, there’s still not the end of the world. We still have the chance to recover the valuable data.

The first thing we need to do is download the data recovery program to fix fatal errors. Here we strongly recommend the Bitwar Data Recovery, which is dictated to allowing users to perform hard drive recovery with few clicks.

Simply click the download button to free get the Bitwar Data Recovery and then install on different partitions or devices, this is the way to make sure the data on partition or device won’t be overwritten.

Steps to recover data from inaccessible hard disk.

Steps 1. Launch Bitwar Data Recovery and then select the target device you wanna recover (Click the device with the name of HD). Click Next to continue.

Steps 2. Select all of the file types and then click Scan.

Steps 3. The software will automatically launch to scan all of the existing files you have on the hard disk and then it lists out in details for you. Double-click the file and make sure the data is exactly as you need,  then hit the Recover button to save the data on the different partition or device.

4271357034?profile=RESIZE_710x

Tips: Please Do Not save the files back to the device that has the request failed due to a fatal device hardware error.

Methods to fix the request failed due to fatal device hardware error?

Method 1. Reformat the hard disk

Press WIN+X >> Disk Management >> Right-click the device has fetal error >> Click Format >> Well Done

Method 2. Initial the disk

Press WIN+X >> Disk Management >> Right-click the not-initialized device >> Initial the disk >> Select MBR or GPT as you need >> Right-click unallocated partition >> New Simple Volume >> Assign the drive letter >> Perform a quick format >> Well Done

Method 3. Run CHKDSK

Press WIN+X >> Command Prompt (Admin) >> Type: CHKDSK X:  /F (Replace X:  to the exact drive letter) >> After CHKDSK /F finished >> Type: CHKDSK X:  /R (Replace X:  to the exact drive letter) >> Well Done

Tips: CHKDSK /F will fix system errors on the disk
Tips: CHKDSK /R will try to recover bad sectors on the disk.

Please refer here for more about data recovery.

A Fatal Device Hardware Error

Summary:

The request failed due to a fatal device hardware error or not accessible fatal device hardware error is a commonly seen error that causes data loss from Western Digital or Seagate hard drive. Today in this article we will focus on how to fix this issue.

Yesterday, a customer sent us an email and asked why his computer appearing the request failed due to a fatal device hardware error and he couldn’t access the Seagate hard drive. Then, he asked us for help and finally fixed the issue and get back his deleted files.

That’s why today we would like to tell about this issue and show you the steps to fix the request failed due to a fatal device hardware error and recover deleted files.

What is the Request Failed Due to A fatal Device Hardware Error?

To explain what is the request failed due to a fatal device hardware error happens on WD or Seagate hard drive to whom does not meet such issue before, we took a screenshot as below:

Generally, you’ll get an error message showing that X: \path name is not accessible. The request failed due to a fatal device hardware error. Yet, you may receive such location is not available error message no matter from the hard drive, SD card or on Disk management on Windows 7/8/10.

At this moment, the system just informs you the device is going to the end of its life. You should hurry to download the hard drive data recovery software in order to rescue the data from the hard drive.

Consider the vital data on the hard drive, the earlier you perform the hard drive recovery, the faster you can retrieve data.

The best solution to recover data from inaccessible partition/folder/drive?

From the previous data recovery tutorials we posted on the tutorial section, you probably agree that losing data no matter from accidental deletion, formatting or even worse scenarios, such as the request failed due to fatal device hardware error, you need to format the disk before you can use it; USB shows 0 byte or any other issues from any of the storage devices, there’s still not the end of the world. We still have the chance to recover the valuable data.

The first thing we need to do is download the data recovery program to fix fatal errors. Here we strongly recommend the Bitwar Data Recovery, which is dictated to allowing users to perform hard drive recovery with few clicks.

Simply click the download button to free get the Bitwar Data Recovery and then install on different partitions or devices, this is the way to make sure the data on partition or device won’t be overwritten.

Steps to recover data from inaccessible hard disk.

Steps 1. Launch Bitwar Data Recovery and then select the target device you wanna recover (Click the device with the name of HD). Click Next to continue.

Steps 2. Select all of the file types and then click Scan.

Steps 3. The software will automatically launch to scan all of the existing files you have on the hard disk and then it lists out in details for you. Double-click the file and make sure the data is exactly as you need, then hit the Recover button to save the data on the different partition or device.

P3.png

3 Methods to fix the request failed due to fatal device hardware error?

Method 1. Reformat the hard disk

Press WIN+X >> Disk Management >> Right-click the device has fetal error >> Click Format >> Well Done

Method 2. Initial the disk

Press WIN+X >> Disk Management >> Right-click the not-initialized device >> Initial the disk >> Select MBR or GPT as you need >> Right-click unallocated partition >> New Simple Volume >> Assign the drive letter >> Perform a quick format >> Well Done

Please refer here for more about data recovery.

Data Recovery Software Free Download Full Version with Key

Summary

The best & easy way to fight against any data loss is backup. Sometimes backup itself not enough to recover lost or deleted data because there is no backup of data or backup has not updated data. We understand data loss can happen with anyone at any time. When it comes to data safety, you can never be 100% sure that your data is protected and safe from any kind of loss or situation. There is always something unexpected that can happen. Considering all the scenarios in mind, I recommend a powerful full version data recovery software ie Bitwar data recovery. You can download this free trial data recovery software by clicking on the Download button.

Bitwar Data Recovery is a fast, reliable, powerful, and free trial Data Recovery software. This free data recovery software to recover lost or deleted data from different storage devices such as internal & external hard drives, pen drives, memory cards, etc.

When you got to know that you have lost your important data or unable to access your most used drive / partition where you saved all your priceless data then stop using that drive / partition immediately, and use Bitwar Data Recovery to recover your data as soon as quickly.

Step 1:launch Bitwar Data Recovery, Select recovery mode according to the actual situation.

● Delete File Recovery: Disk data accidentally deleted files can be recovered from here.

● Formatted Hard Drive Recovery: Mistakenly formatted disk, USB drive, removable hard drives and memory cards can be restored from here.

● External Devices Recovery: Accidentally deleted files on the USB drive, removable hard drives, memory cards and camera card can be restored from here.

● Recycle Bin Recovery: Recycle Bin emptied by mistake or Deleted files from Recycle Bin can be restored from here.

● Lost Partition Recovery: Accidentally re-partition or Ghost installation system causes the partition lost, you can find lost partitions and files here.

● Deep Recovery: Matching existing file structure in partition can find more files, but with no file name provided, scanning will take longer.

Step 2:Select The Partition/Drive you lost files and then select the file types to which the data you want to recover belongs, click on the “Next” button.

The Bitwar Data Recovery supports all file types: Pictures, Videos, Audio, Emails, Documents and Others Files.

Step 3:Bitwar Data Recovery will start to scan quickly. you will see all missing files that match the selection will be listed. After a scan, choose the data you want and you can make a selective recovery with Preview. Choose the data you want and click “Recover” to get them back.

Please refer here for more about data recovery.

Design a site like this with WordPress.com
Get started