This article will walk you through some of the best ways to resolve the “CHKDSK cannot continue in read-only mode” issue and recover all the vital data using the powerful data recovery software – Bitwar Data Recovery Software!
There are several errors which computer users may encounter while performing day to day operations on their PC. These errors not only hamper the work tasks but also consuming their time and effort. In this article, we will discuss one of the common mistakes, “CHKDSK cannot continue in read-only mode” and discuss the effective possible solutions to solve the error.
CHKDSK on Windows works to help users to fix the issues that are related to file system, disk partitions, and storage in the PC system. However, at times, during the scanning of operating systems or any external storage media, CHKDSK may end up giving some errors and issues, one of these errors is “CHKDSK cannot continue in read-only mode.”
Main Reasons for Error
Most users and technician shares that most of the possible reasons that cause the “CHKDSK cannot continue in read-only mode” error to happen can be as stated below:
- Viruses and malware in the disk.
- The disk is composed of a read-only file system.
- Corrupted or missing system files.
- When the disk cannot be written or edited, or the target hard drive is read-only.
- When any other process or program is using the target drive.
- A corrupted hard drive.
Before we directly jump to the practical solutions to fix “CHKDSK cannot continue in read-only mode” error, it is essential to recover all the vital data to prevent any data loss by using the high quality and trusted data recovery software.
Recovery Tool
Bitwar data recovery software is our choice to restore any kind of software data like images, audio, video, and pdf, etc. from any type of storage device such as hard disk, flash drive, and memory card, etc.
Follow the tutorials below to retrieve data using Bitwar Data Recovery Software when “CHKDSK cannot continue in read-only mode” error is encountered:
Step 1. Download Biwar Data Recovery Software according to the software system.
Step 2. Launch the recovery software and click on the Select Partition or Device. Then, click Next.
Step 3. Choose the Quick Scan mode to restore files from the drive. If you are unable to find the data by using the Quick Scan, then try to use the Deep Scan mode.
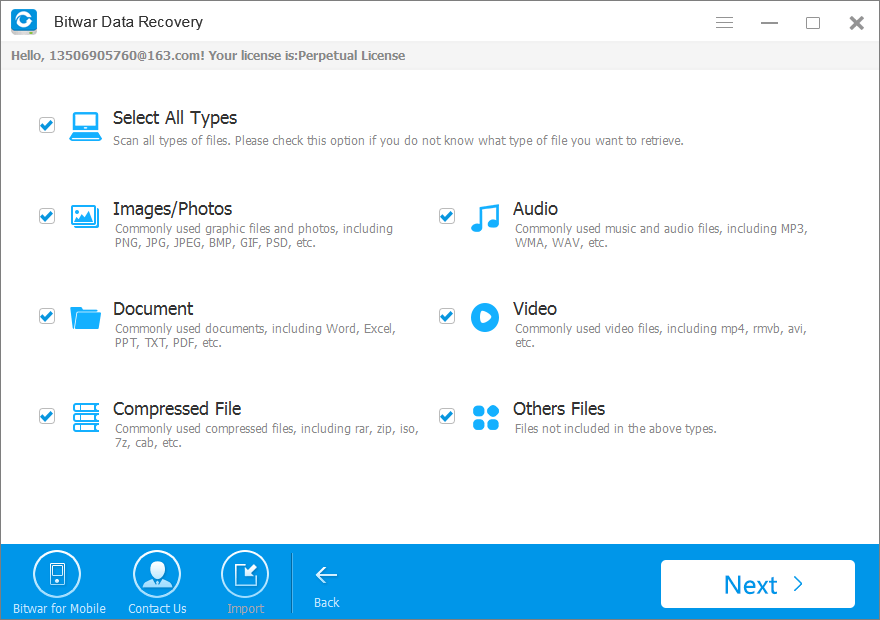
Step 4. Select all the File type and click on the Next button.
Step 5. Lastly, Preview the file you want to recover and click on the Recover button to start the recovery process.
Important Note: Please save the recovered data on a new file location instead of the old location to prevent DATA OVERWRITTEN.
How to Fix “CHKDSK cannot Continue in Read-only Mode” Error on Windows
Solution 1: Schedule CHKDSK on Reboot Mode
Step 1. Launch the Search menu by pressing the Wins + S key and type in Command Prompt.
Step 2. Choose the Command Prompt (Admin) option from the search menu window.
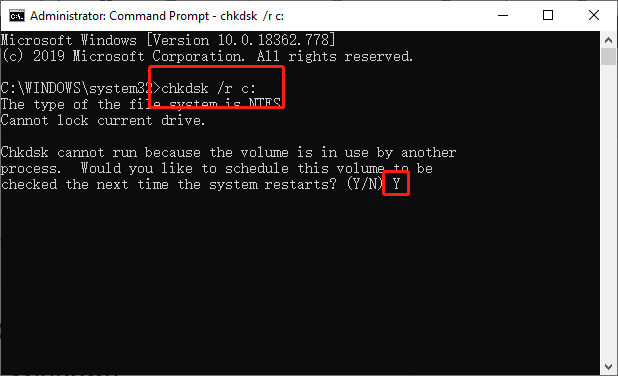
Step 3. In the command prompt, input the command chkdsk /r c: and press on the Enter button to execute. Here, replace c with the drive letter on the PC.
Step 4. After this, click on Y when you are being asked, “Would you like to schedule this volume to be checked the next time the system restarts?”.
Step 5. After restarting the system, CHKDSK will get launched automatically to check and repair any disk errors.
This solution should solve the CHKDSK error, in case it is not solving the issue, try with the fixes below to fix it.
Fix it Now!
Please refer here for more about Chkdsk Cannot Continue In Read-Only Mode Error.
